 1. Start with three inexpensive t-shirts. (thank you end of summer season sale at Old Navy)
 2. Take one shirt, mark and cut a line approximately 1 1/2" below the armpits (these measurements are based on where an empireish waist for my daughter would be -- but I can't see why you couldn't do this for anyone just measure their body). Set aside.
 3. Take the other two shirts and mark and cut a line right underneath the armpit. Make sure both sections are the same length.
 4. Turn both the "skirt" sections inside out and cut along one seam line. (really -- only one please)
5. Right sides together, pin both edges of the skirt sections together -- make sure the finished edges match, the top edge can always be trimmed but it would be a pain to re-do the factory finished hem. Sew both sides using a 1/2" to 5/8" seam. (doesn't really matter here -- I used a 1/2", only thing necessary is that it be consistent). When you are done you should have a tube double the size of the tubes you started with.
 6. Finish the edges with a zig zag or overlock stitch (or with a serger if you have one). (My machine has a lovely little overlock stitch foot which has come in handy more times recently -- and here I thought when I bought the machine I would never use the darned thing!)
 7. Select a long basting stitch on your machine. Along the cut edge of the tube you've just created stitch inside the seam allowance. No, this doesn't have to be pretty. These are just gathering stitches. (note -- I actually started and stopped 4x when putting these in, one in each "quadrant" of the tube -- just make sure you have nice long tails of thread to be able to create your gathers)
 8. Right sides together and matching side seams (I hid my "new" seams on the sides here) pin the bodice piece (remember that one from step 2?) and skirt together. (I also tacked the mid points of the skirt front and back) Holding on to the bobbin thread from your long basting stitch pull gently (kind of gently -- try not to break the thread at least) to create a gather and pin like crazy. Really. Pin that sucker down. This is NOT the time to be stingy with the pins!
9. Stitch using your 1/2" or 5/8" seam. Finish edges.
10. (OPTIONAL) While sewing skirt to bodice explain to 2 year old dd that if she touches the stitch length button one more time she is getting a time out since she is not allowed to touch Mommy's 'chine in the first place. Repeat the warning as many times as is necessary to finish the seam. Also explain that no, she can't sit in Mommy's lap RIGHT NOW -- give Mommy 5 minutes and she can have all of the cuddles and lap time she wants. Also warn her that she can NOT touch Mommy's pins -- they are sharp. Watch her reach out and just barely touch them just to see your reaction. Glare at the child while silently wondering WHY she needs to do this. Remember why you usually sew during nap time and/or when small child is at daycare!
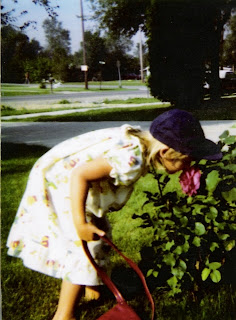
 11. Flip shirt right side out, admire work. Think about the way you are going to embellish the darling little top (this is just crying out for some yo-yo's I'm thinking) -- as small child grabs it out of your hands, declares "MINE" and starts pulling off her beloved Elmo t-shirt to put it on. Figure what the heck and go with the moment.
 12. Blog about the experience later that night -- and realize that no, it isn't quite what I had in mind (I thought it would be longer and more like a dress -- though the process has potential for a comfy drop waisted dress -- just cut the bodice longer. But kind of makes me wonder at how economical it would be to do that -- sorry Mom, you may have been right here). And giggle -- a lot -- because while it isn't totally FINISHED yet (I still plan to put some of those yo-yo's on)-- and it won't be until it is washed because I couldn't get it off my child. It is sporting some mac and cheese and triple berry pie stains from dinner out with Nana and Papa. But -- still giggling that I made something my daughter couldn't wait to put on. And it beat out Elmo.
13. Remember that dd is sleeping in the next room and I need to keep the giggles down.
So there you go -- my recipe for wanting to get back to making things. Seems to have worked so far. And I'm now off to bed as it's late, and dd is going to daycare tomorrow (yeah for Mommy's day off) so I can sew most of the day after some errands get run. That is IF I can get some sleep tonight.
Update 11/19/07: The finished version of this t-shirt can be found here. I also took some suggestions of folks who left comments and tried a version using fabric for the "skirt" -- a really cute variation and you can see the results here.


27 comments:
What a good idea!
Kind regards,
Sonnja
It may not be the most economical of projects but it's sure darn cute!!! It'll be even cuter with the yo-yo's on it!
I love it!
Way too cute!
that's adorable- thanks for sharing!
Glad to see you have your "groove going".... Very cute, reminds me of all the sewing I did for my 4 when they were little. This would also work well with purchased fabric for the skirt portion...
What a smart girl you are! I am going to have to copy you - my granddaughter would love one (or two or three) of those shirts!
Adorable!! Thanks for sharing!!!
It's sweet and your DD adores it! Good job, momma!
Thanks a lot for the great tutorial. I can see a niece of mine with a nice ruffled shirt in the near future. About your DD, I would say "terrible twos" although then it goes on " terrible threes, terrible fours, ... " My son is 7 and it is "terrible sevens"! Be patient and take care.
Its adorable!
Wow you out did Elmo! I'm impressed!
Pretty cool, beating out Elmo! That's not easy to do!
This reminds me of matching dresses I made for my DD and myself a long time ago. It was just a purchased T-shirt with fashion fabric (quilter's cotton in my case) gathered onto the hem to create the skirt. Hem the skirt and you're done!
Angela, Hi from Nashville! We are doing the AQS show here this week, but wanted to keep "up" on what's new with you. Love the little dress! What a great project! Hope to see you again soon!
Tammy and the girls!
Step 10! What a classic!!! S o true and sounds soooo familiar!
wow!!!! Tou are a genius!!!!
do you wont to enjoy with 'Babbo Natale Swap' with italians women????
Come to see my blog....
How clever! I never would have thought of something like that.
Oh, so cute! I remember the days when I used to make dresses for my little girls. I guess I shouldn't tell you that my oldest DD would hide in the closet and cut them with scissors. But that was okay because she would patch them back up with electrical tape. ROFLOL! Yes, we can laugh at it now, but it sure wasn't funny at the time!
I made t-shirt dresses for my girls but sewed cotton on the bottom. If you tried that you could make matching yo-yos! Have fun!
That's a great idea! Simple and inexpensive and so adorable!
Okay, so you can buy the T-shirts at Old Navy on sale, but where can you pick up one of those cute models? I'll need to get myself one of those someday--maybe from one of my kids! LOL!
What a fun post to read, Angela.
That's absolutely adorable on your daughter!
I like! My mom tried that- only with cotton calico as the "skirt." I love Old Navy T's- don't know if I'd have the heart to cut into one! Hope your creative juices are doing more than just mulling, now!
Great idea, and she loves it.
I do a similar thing here and it may appeal to you. My girl loves dresses, even for home and especially in winter, and has since your girl's age. So when the long sleeved t-shirts get too short in the waist I add anthing I have floating around as a skirt. I just sew one seam so it is a big tube, gather the same as you to whatever the t-shirt width is and then sew it on to the bottom of the t-shirt. I make it out of windcheater material, cord, anything, and then she has warm and cosy winter home dresses and gets literally years more out of her favourite mermaid/disney tops.
I often add a decorative stitch to the hem and when she stains it or cuts it with scissors then we would embellish/applique! Still working even at 9 and uses up scraps and old clothes so pretty economical,lol, Tracey
You look like you've been having loads of fun. I hope to start reading again and stay caught up. Love your description of your daughter in the sewing room.
What a great Idea!
is is wonderful! I may have to try it with a few of my T-Shirts! Great Tut!
So cute and imaginative. I used to make my daughter's dresses when she was small, then she made dresses for her daughter. Neither of us did out of t-shirts tho.
And I grew up in cornfields, on a dairy farm in the Hudson River Valley of NYS. How we children (sister, brothers and I) liked to run through the rows of tall corn in the small field behind the barn. Mother let us do it there because there was no chance of us getting lost. The rows weren't too long.
Usually most of the band t-shirts are quite inexpensive because they have a promotional purpose. After all, anyone
with a band t-shirt promotes their product for free every time wearing it.
design a t shirt
print on shirts
digital t shirt printing
custom tee shirts
create t shirts
Some people wear their hearts on their sleeves, but we prefer to keep them safe in the home inside our chest. Cover
your warm fuzzy secret heart with geeky things: t-shirts,costumes, oh my! We have all the
clothes and accessories a geek man, kid, or baby could ever need.
design a t shirt
print on shirts
digital t shirt printing
custom tee shirts
create t shirts
Post a Comment